
You’d think importing bank statements into QuickBooks would be a breeze, right? But for many businesses, it’s often a frustrating hurdle in their financial management process.
While many banks offer built-in QuickBooks export features, not all do. If your bank doesn’t provide this convenience, you might find yourself staring at a CSV or PDF file, wondering how to get that data into QuickBooks without spending hours on manual entry.
CSV (Comma Separated Values) is a common and widely supported format for storing tabular data, but it may not be directly compatible with QuickBooks.
⛔
To be compatible, you must format the CSV file according to specific requirements. Dates should be in the dd/mm/yyyy format. The file must follow either a 3-column format (Date, Description, Amount) or a 4-column format (Date, Description, Credit, Debit), and so on.
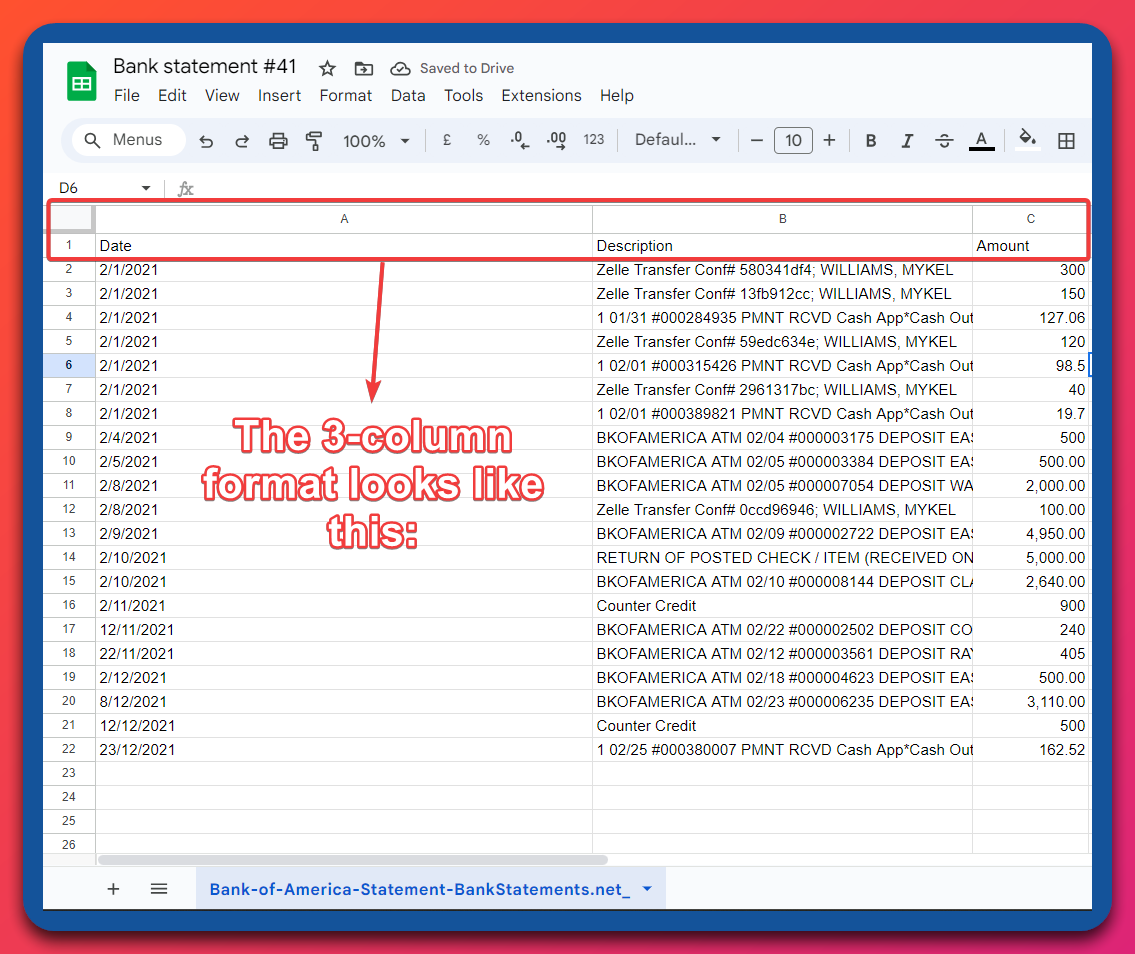
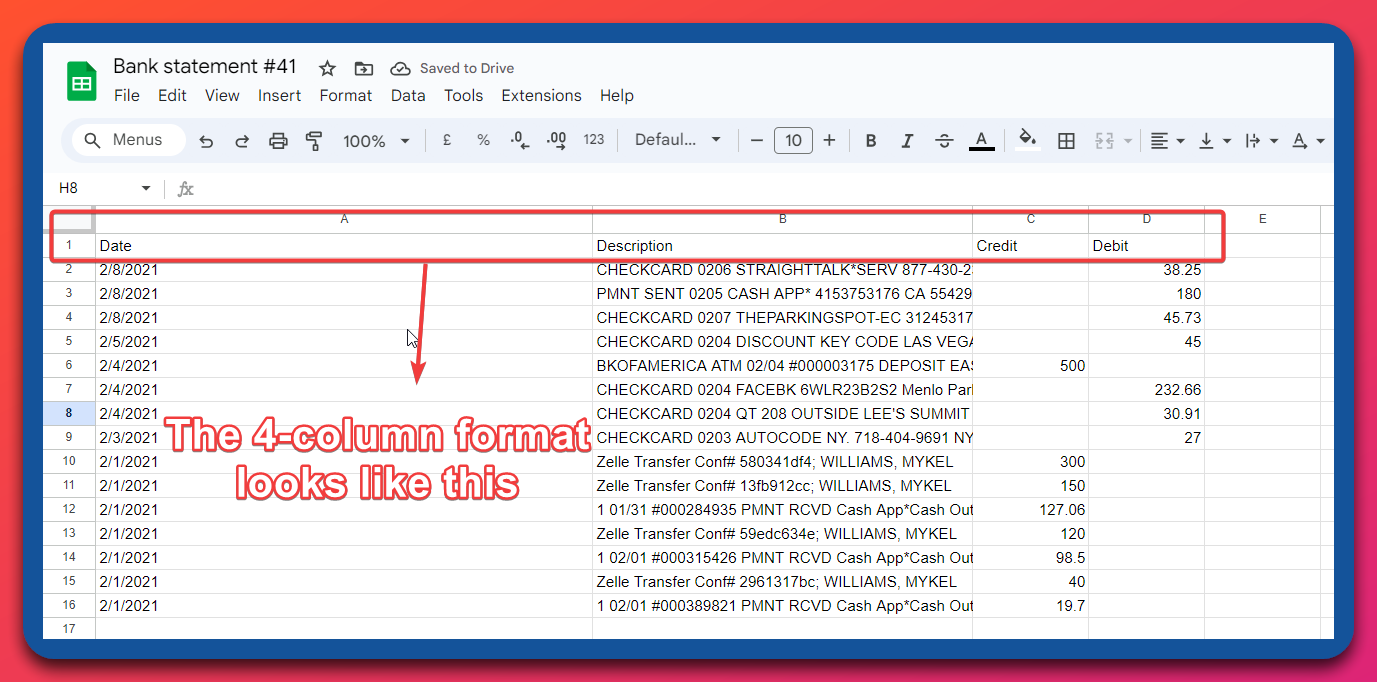
Let’s take a look at sample layouts for both the 3-column and 4-column formats of CSV files that QuickBooks accepts:
| Date | Description | Amount |
|---|---|---|
| 01/01/2024 | Office Supplies Inc. | -150.00 |
| 02/01/2024 | Client Payment | 500.00 |
| 03/01/2024 | Monthly Rent | -1000.00 |
| Date | Description | Credit | Debit |
|---|---|---|---|
| 01/01/2024 | Office Supplies Inc. | 150.00 | |
| 02/01/2024 | Client Payment | 500.00 | |
| 03/01/2024 | Monthly Rent | 1000.00 |
These hurdles can make file import a pain. This is where converting bank statement CSVs to QBO-compliant format becomes crucial. In this article, we’ll discuss three ways to convert your CSV files into QBO format for seamless QuickBooks import.
- Manually reformatting CSV files to meet QuickBooks requirements
- Using third-party CSV to QBO converters
- Automating CSV to QBO conversion with AI-powered data extraction tools
Let’s get started.
1. Manually reformatting CSV files to meet QuickBooks requirements
Using a spreadsheet program like Microsoft Excel or Google Sheets, you can manually restructure your CSV file to QBO format for smaller datasets.

Here’s a quick overview of the process:
1. Open the CSV file on your computer using your spreadsheet program like MS Excel or Google Sheets.
2. Review the column headers, the format of the dates, and the overall structure.
3. Clean up your data — delete any unnecessary columns or rows, commas from number fields, leading zeros in front of number fields, duplicates, and blank cells.
4. Rearrange your columns to match QuickBook’s preferred order — Date, Description, and either Amount (for a 3-column format) or Credit and Debit (for a 4-column format).
5. Make sure your dates are in the format “dd/mm/yyyy.”
6. Ensure your column headers match what QuickBooks expects. For instance, “Amount” instead of “Amt” and “Description” instead of “Desc”.
7. Save the edited file as a new CSV file.
8. Follow the prompts to map your columns to QuickBooks fields (this should be straightforward if you formatted your data correctly).
9. Review and confirm the import.
💡
Note for Mac Users: Please make sure that you save the file in the Windows CSV format to maintain compatibility with QuickBooks.
Sounds tedious? It is. And that’s just one statement. Imagine doing this weekly or monthly for multiple accounts. While it gives you more control, it can also be time-consuming and prone to errors. Even misplaced commas can throw off your entire import. You’ll have to figure out what went wrong with the import. And it will get worse with the more data you have.
2. Using third-party CSV to QBO converters
If you are looking for an alternative to manual reformatting, third-party CSV-to- QBO converters offer a specialized solution. Tools like DocuClipper and Propersoft can help bridge the gap between CSV files and QuickBooks’ required QBO format.
These applications or web-based tools take your CSV file as input and produce a QBO file as output. Here’s a general overview of how these converters typically work:
- Log in and upload your CSV bank statement into the converter
- The converter extracts the transactions and converts them into a QBO-ready output
- Download the QBO file
- Upload the QBO file manually into QuickBooks
While these tools certainly simplify the process, they lack automated workflows. So, you need to manually collect CSV files from email, cloud storage, or your bank’s website, then upload them to the converter tool. Then, you’ve to process them individually. This can still be time-consuming for businesses dealing with multiple accounts or frequent transactions.
Moreover, the task doesn’t end after downloading it. You’ve to manually organize the files manually and then upload them into QuickBooks. This makes bulk processing challenging and time-consuming, especially for businesses with multiple accounts or high transaction volumes.
You can’t manually reformat CSVs when you have a lot of files to process. It’s time-consuming and tedious, and let’s be honest, there are better ways to spend your time. Automating the CSV to QBO conversion process can be a lifesaver if you’re regularly importing financial data into QuickBooks.
This is where Nanonets can help. It is a powerful, AI-powered OCR software that automates data extraction and conversion, making it easy to get your CSV files into QuickBooks Online without breaking a sweat.
Let’s explore how Nanonets simplifies this CSV to QBO conversion process:
1. Create a free account on app.nanonets.com. No credit card is required!
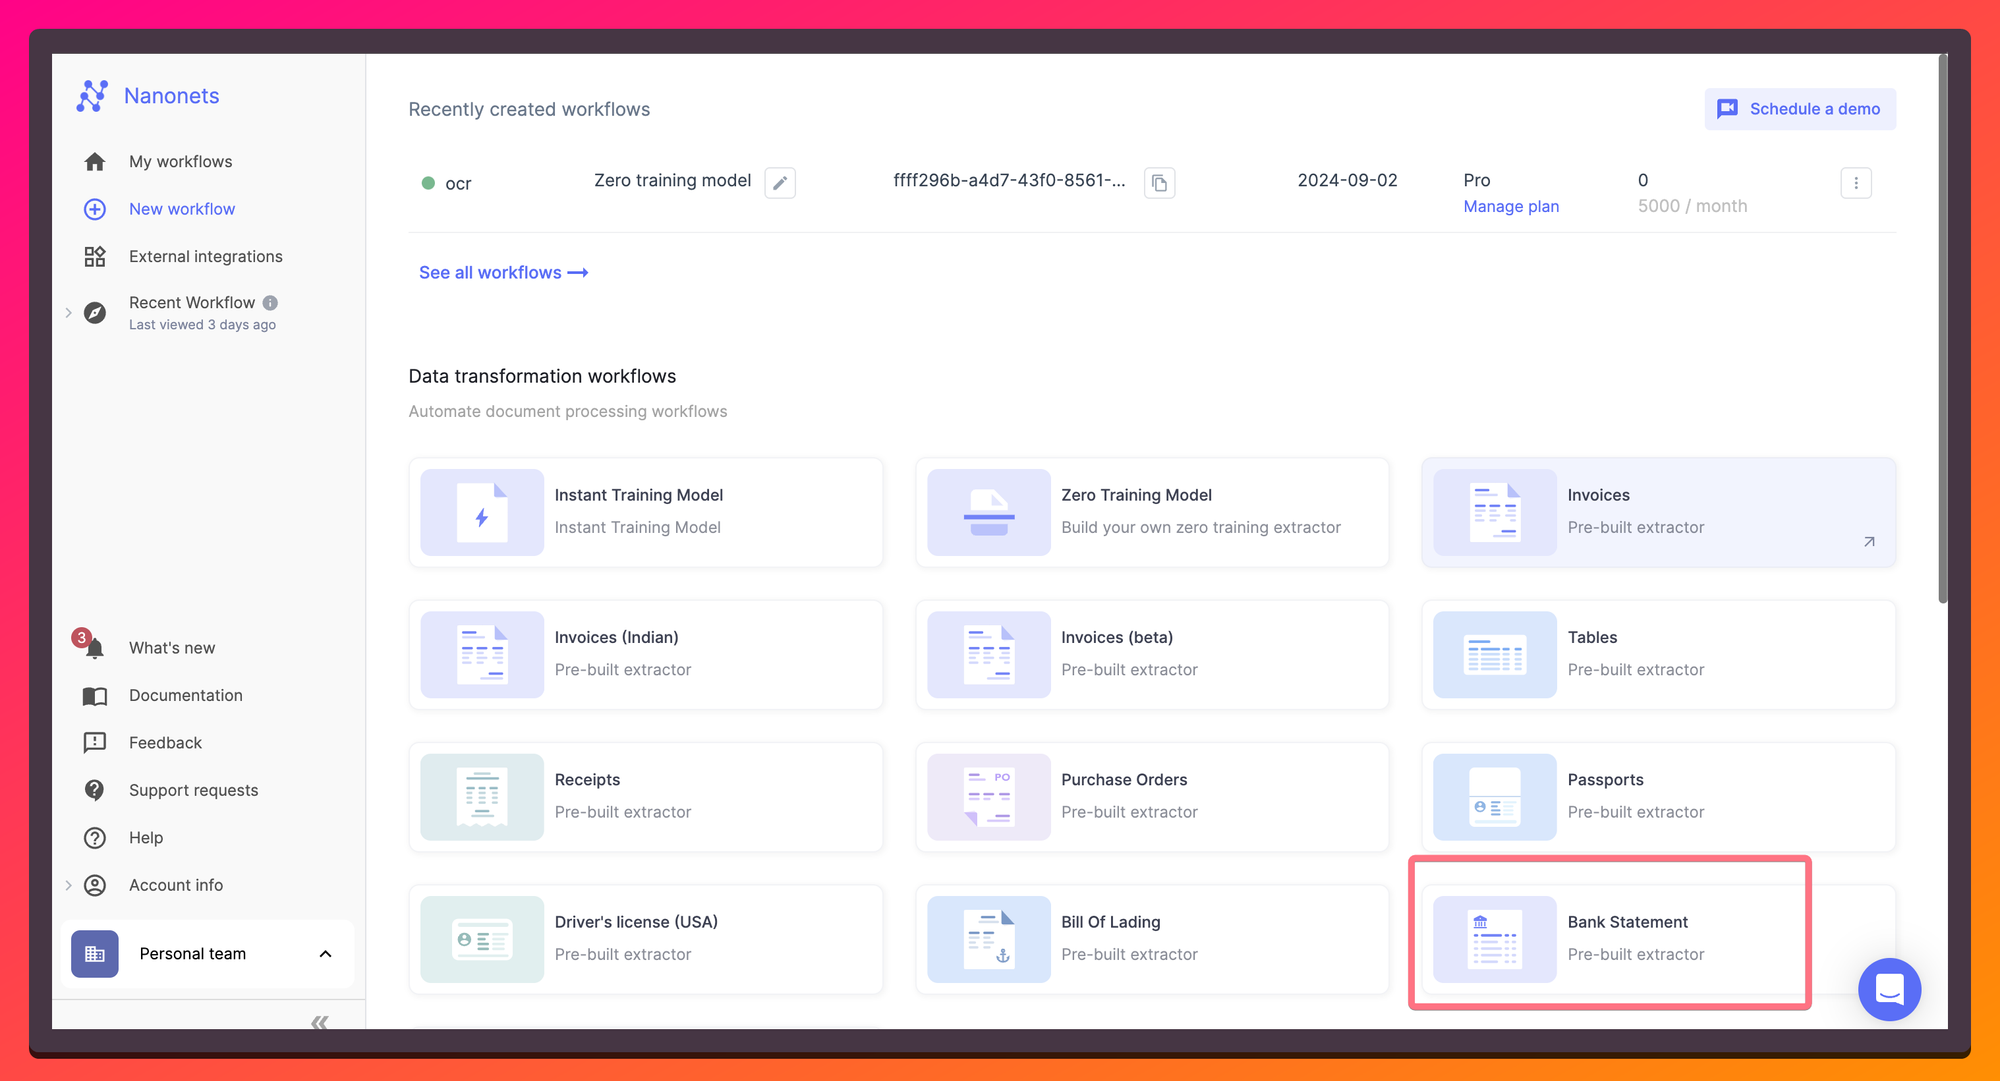
2. Once you verify your email and log in, navigate to the ‘Workflows’ section and select ‘Create New Workflow’, then choose Bank Statement Workflow.
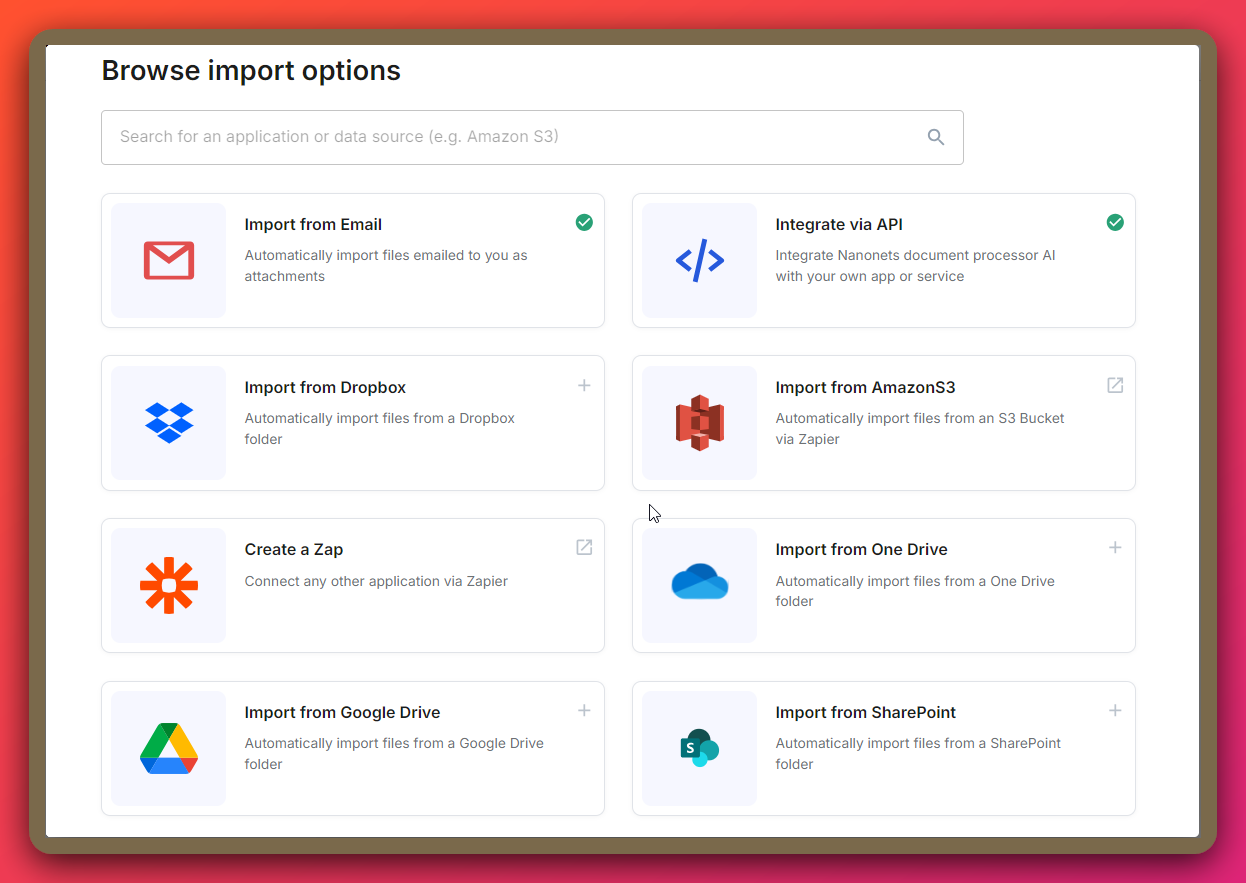
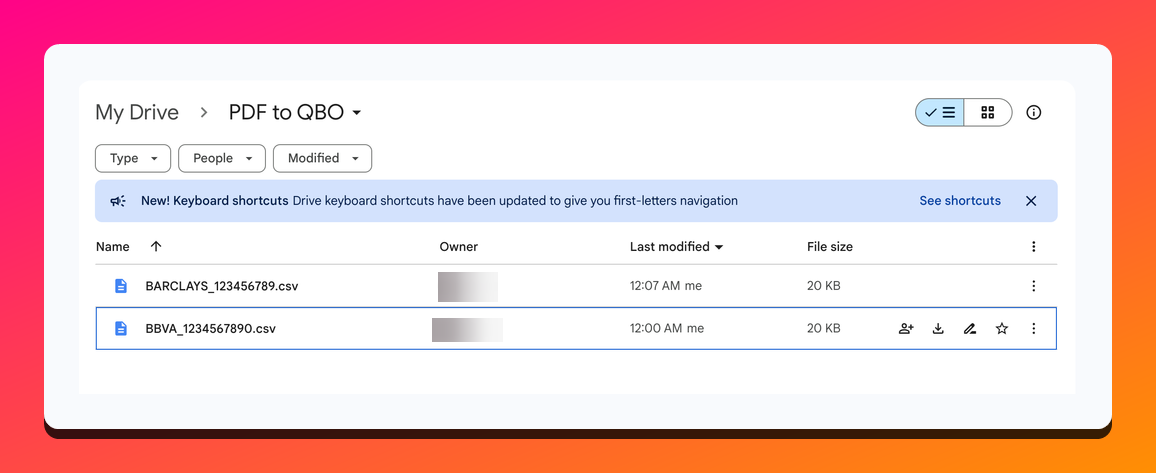
3. Upload your CSV file to Nanonets. You can also set up auto-forwarding via email to upload your bank statements automatically.
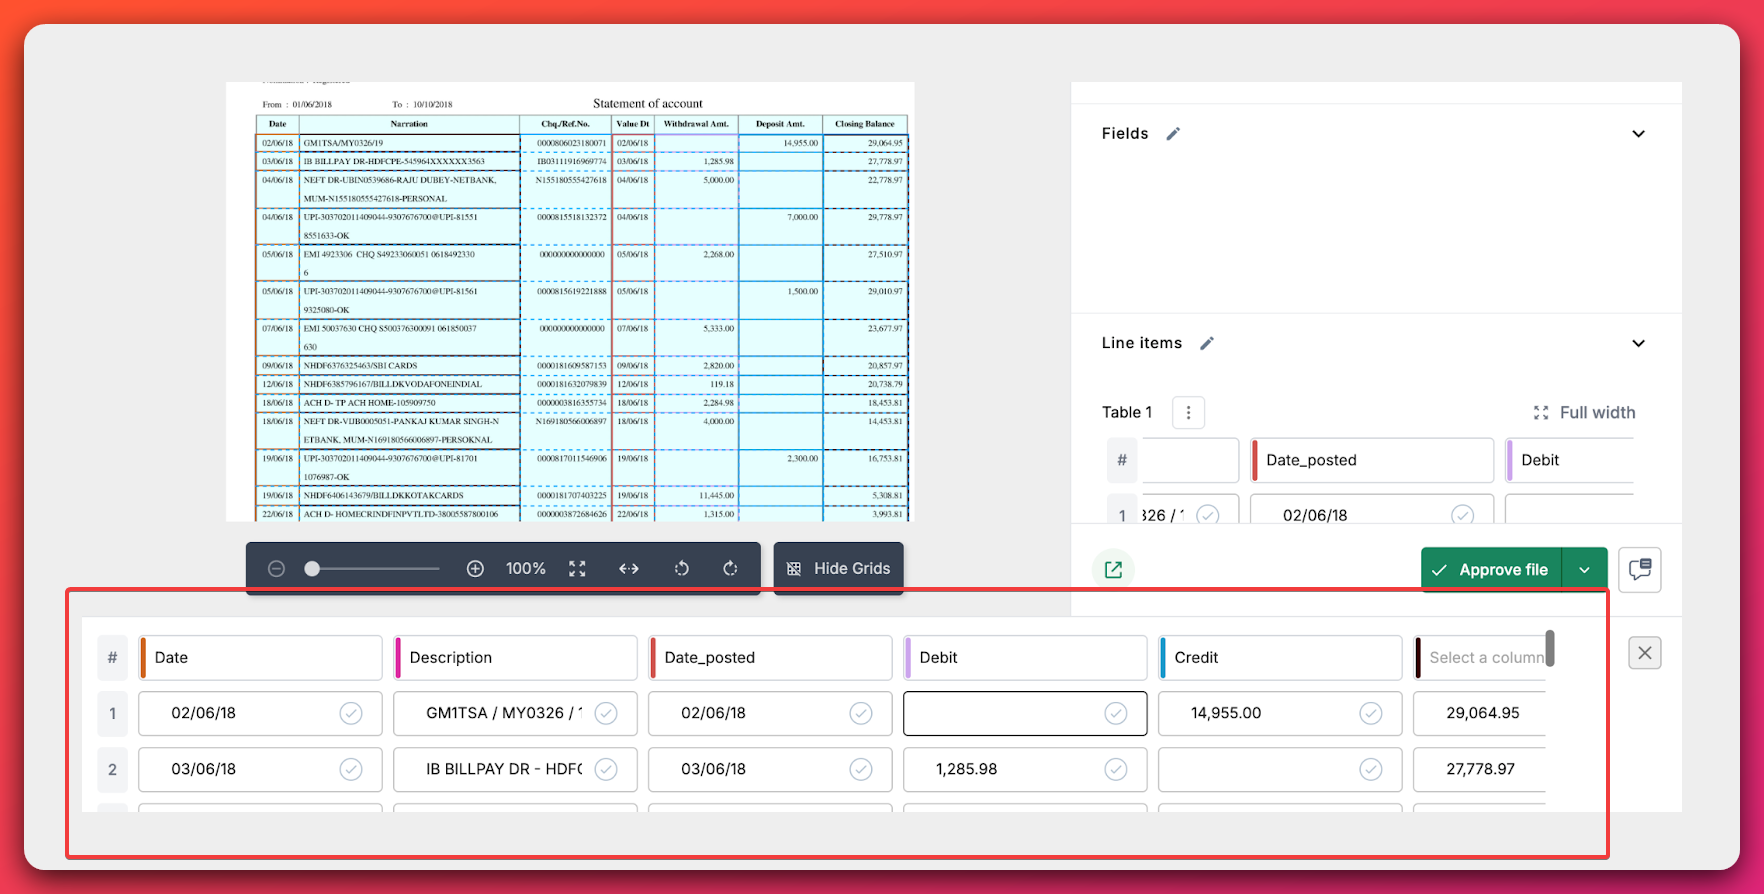
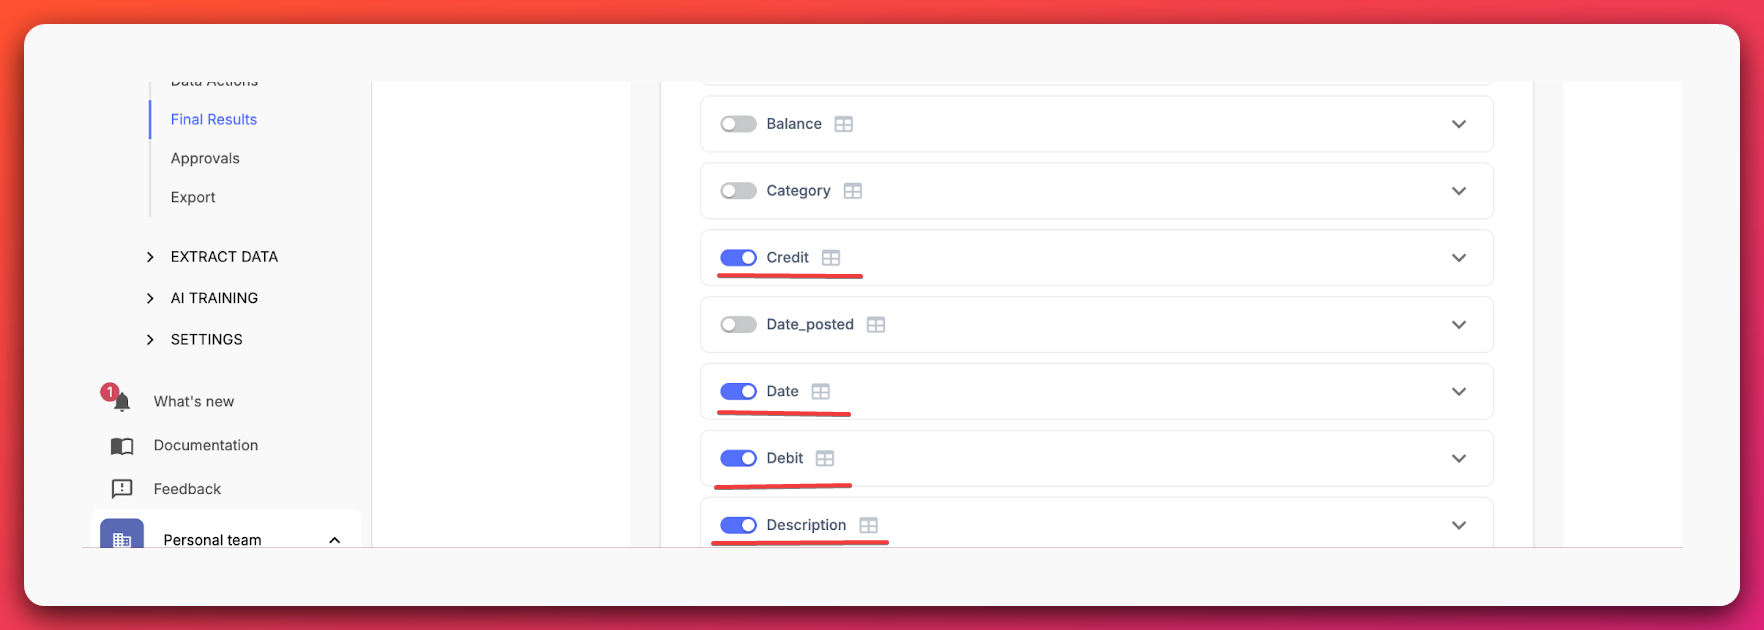
4. Review and edit the output if needed. Nanonets will automatically extract the data and map the fields. You can review and make any necessary edits to ensure accuracy.
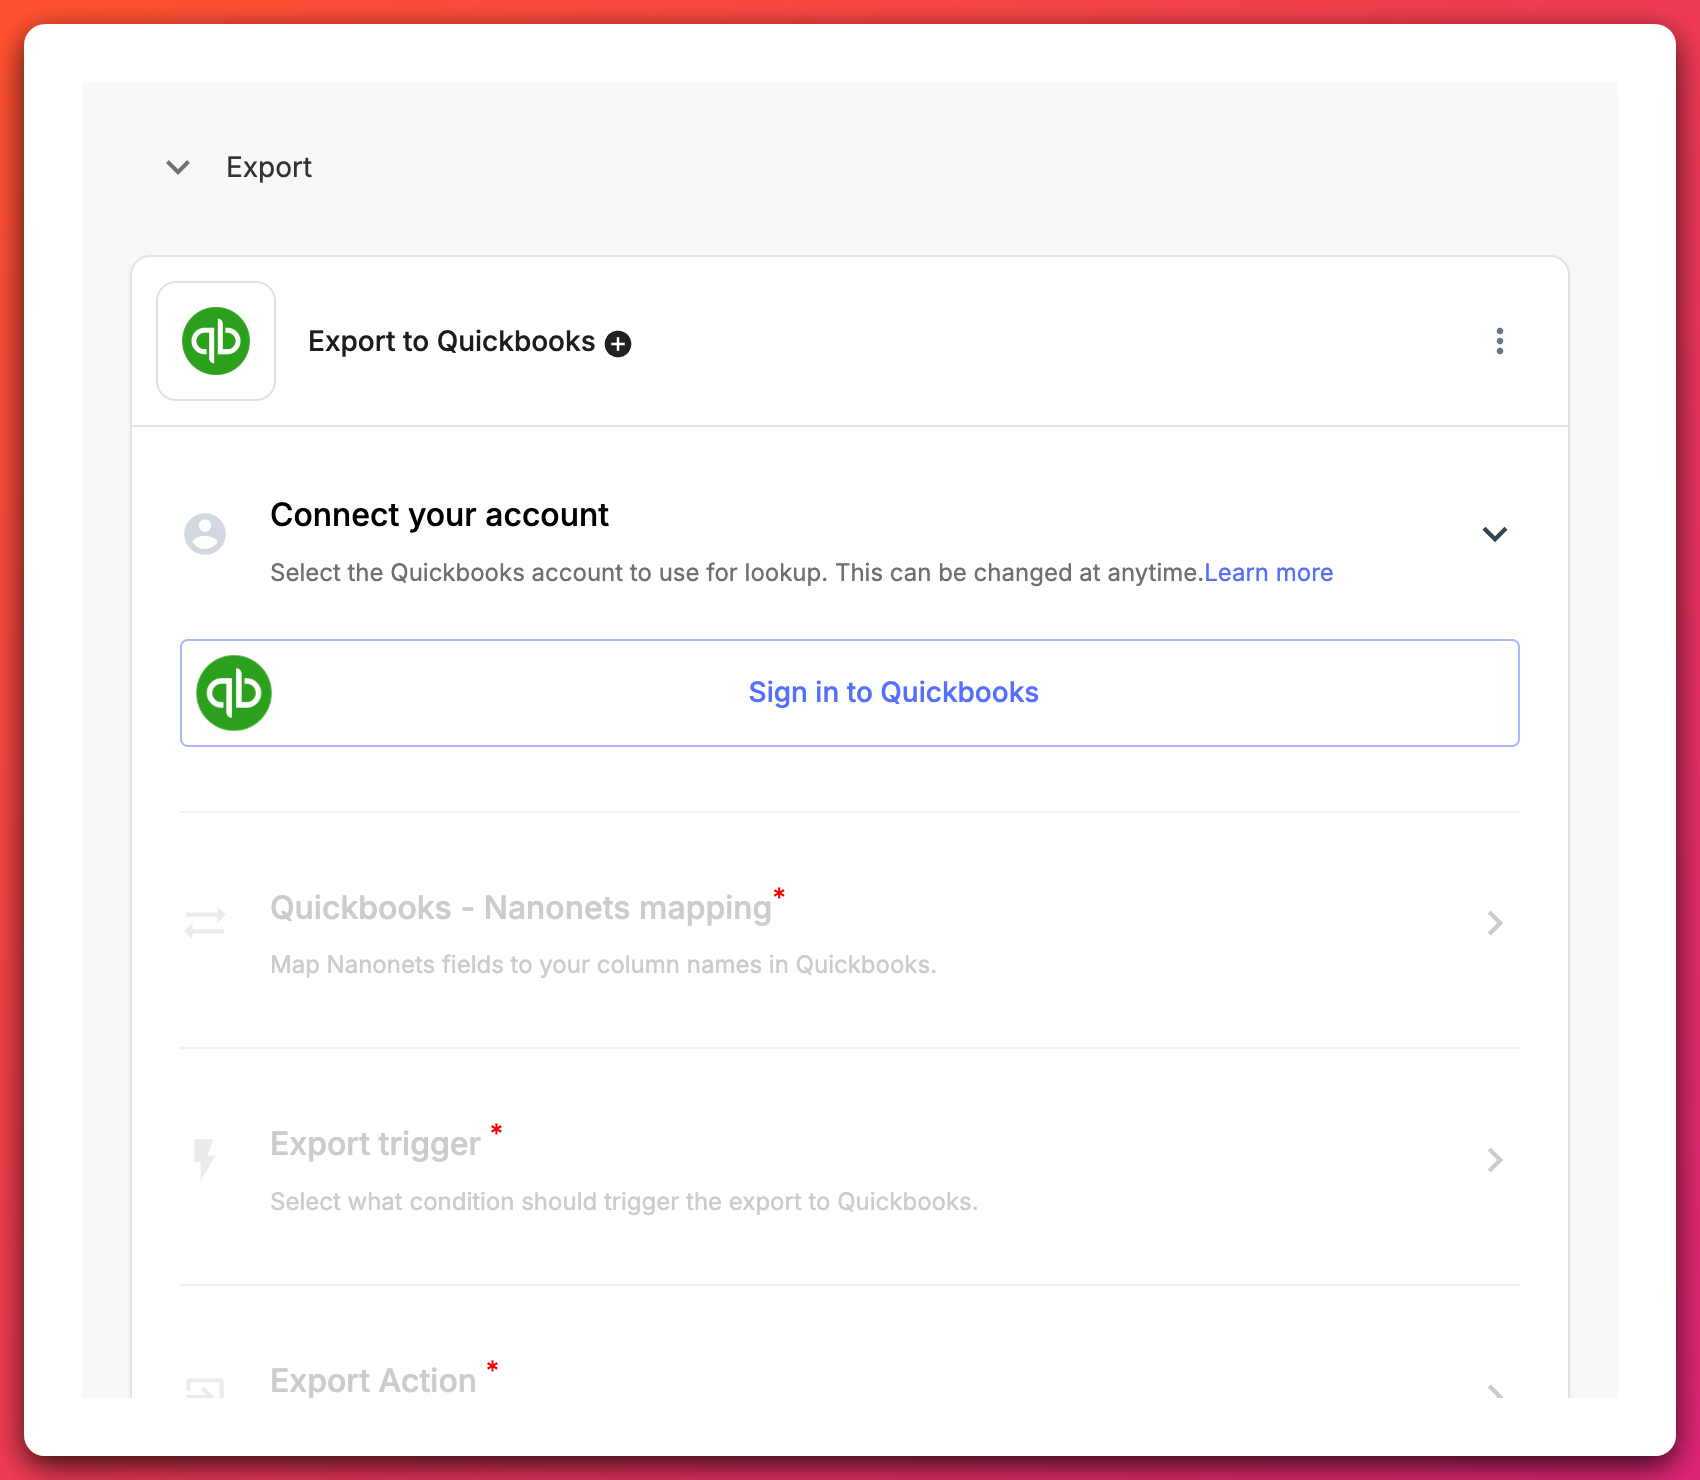
5. Next, set up an automated export workflow to QuickBooks. Choose QuickBooks Online as the export destination and then follow the step-by-step instructions to connect your QuickBooks account. Alternatively, you can choose Google Drive as your destination if you prefer to store and organize statements in your cloud storage.

6. Nanonets will automatically export your converted data to QuickBooks Online, saving you time and hassle.
What sets Nanonets apart is its ability to handle variations in your CSV formats. Unlike manual reformatting, where you’d need to adjust for each new format, Nanonets learns and adapts. This means it can handle different date formats, extra columns, or other inconsistencies that typically cause import errors in QuickBooks.
Moreover, Nanonets offers several features that go beyond simple CSV to QBO conversion:
- Data cleaning: Nanonets can automatically remove unnecessary columns, clean up number fields, and standardize date formats.
- Flexible importing: Set up auto-forwarding via email or connect to cloud storage services like Dropbox or Google Drive for seamless file uploads.
- Approval workflows: Set up rules to flag certain entries for review before they’re exported to QuickBooks, adding an extra layer of accuracy to your financial data.
- Document classification: Automatically sort different document types (invoices, receipts, bank statements) and route them to appropriate models.
- Advanced QuickBooks integration: Along with exporting data into QuickBooks, map fields precisely, choose between creating account-based bills, item-based bills, or expense entries, and even select specific AP or expense accounts for posting.
With Nanonets, you’re not just saving time on CSV reformatting. You’re setting up a robust, scalable system that can grow with your business, handling increasing volumes of financial data with ease and accuracy. It helps keep your QuickBooks data up-to-date and error-free.
How CSV-to-QBO conversion improves your workflow
Streamlining your CSV-to-QBO conversion process offers numerous benefits beyond just time savings. It can minimize the risk of manual errors, ensuring that your financial data in QuickBooks Online is accurate and reliable. This accuracy is crucial for making informed business decisions, from tracking cash flow to generating financial reports.
Let’s quickly compare the before and after scenarios of using an automated solution like Nanonets:
| Scenario | Manual Refromatting | Automated QBO |
|---|---|---|
| Importing statements | Hours of reformatting | One-click upload ⚡ |
| Managing data sources | Multi-step process | One-step process⚙️ |
| Accountant collaboration | Email back-and-forth⌛ | Secure online access and sharing |
| Tax season prep | Last-minute scramble🚨 | Neatly categorized for review 🗄️ |
| Financial reporting | Spreadsheet headaches | Connnected to built-in analytics |
| Data entry errors | Common issue | Very low chances |
| Audit trail | Risk of lost data🚨 | Complete and searchable 🔍 |
This clearly shows how automating your CSV-to-QBO conversion can transform your financial workflow. And once you’ve got the data in QuickBooks, you can leverage its powerful features for insightful reporting, expense tracking, and financial planning.
This shift from manual data entry to automated data management empowers you to focus on strategic decision-making, improve collaboration with your accountant, and better understand your business’s financial health.
FAQs
Why is converting my CSV file to QBO format necessary for QuickBooks Online?
While QuickBooks Online is a powerful accounting tool, it requires data to be formatted in a specific way – the QBO format. Converting your CSV file ensures compatibility, preventing import errors and streamlining your workflow.
I’m encountering a “File Upload Failed” error when importing my CSV. What steps can I take to resolve this?
CSV import errors can be frustrating, but they often stem from simple formatting issues. Let’s troubleshoot:
- Date format: Ensure your dates adhere to the “dd/mm/yyyy” format (e.g., 01/01/2024), as QuickBooks Online is quite particular about this.
- Column structure: QuickBooks Online expects a specific column order: Date, Description, Amount (or Date, Description, Credit, Debit). Remove any extraneous columns that might be causing conflicts.
- Commas in numbers: Commas within numerical values (e.g., 1,000.00) can disrupt the import process. Eliminate these commas before attempting to import your file.
My bank uses a unique CSV format. Will Nanonets be able to process it effectively?
Absolutely. Nanonets is designed to handle a wide array of CSV formats from various financial institutions. Our platform can recognize and extract data from diverse structures, minimizing compatibility concerns.
I’m a Mac user. Is Nanonets compatible with my operating system?
Yes, certainly! Nanonets is a cloud-based platform accessible through any modern web browser. Whether you’re using a Mac, Windows, or Linux system, you can seamlessly utilize Nanonets for your CSV to QBO conversion needs.