
Connecting your bank or credit card accounts to QuickBooks is most seamless way to automatically pull in and categorise transactions, up to a certain date, into QuickBooks.
But what if you want to enter historical bank transactions into your QuickBooks? Or what if you can’t connect your bank account to QuickBooks for some reason?
In that case, QuickBooks recommends that you manually upload your transactions. First you’ll need to export your bank statement in a supported file format such as .CSV, .QFX, .QBO, .OFX, or .TXT file. And then upload the bank statement into QuickBooks.
💡
And finally we find out how AI-based IDP software like Nanonets offer the best solution to directly importing transactions from PDF bank statements into QuickBooks – without having to convert them into QBO!
Uploading bank statements into QuickBooks manually can be a pain
If your bank offers a .QBO export option, you’re all set and can easily upload your converted/exported bank statement into QuickBooks.
But all other output file formats (.CSV, QFX, .QBO, .OFX, or .TXT) will require additional steps/checks before you can upload them to QuickBooks:
- The file size must be less than 350 KB.
- Remove any standalone zeros (0) from the file and leave those cells blank.
- Remove numbers from the Description column.
- The Credit or Debit column header should only say “Credit” or “Debit” respectively – nothing more.
- All dates must follow the same format (dd/mm/yyyy format recommended).
The Date column must not contain the day of the week. - Quickbooks supports CSV in only two formats:
a. Three-column format: This has date, description, and amount.
b. Four Column Format: This has date, description, credit, and debit.
Check more details and restrictions on the appropriate file format for non .QBO files that need to be uploaded into QuickBooks here.
❗
If you’re stuck with a non-QBO file format, you might be required to do a fair bit of data cleanup or post-processing before your file is upload-ready!
How to convert PDF bank statements to QBO?
Clearly, the easier option to manually add transactions to QuickBooks is to convert your PDF bank statements to the QBO file format.
Third-party tools such as DocuClipper, MoneyThumb and others offer dedicated PDF to QBO converters that can assist in this regard.
Without going into much detail, here’s how they work in general:
- Login and upload your PDF bank statement into the tool
- The tool extracts the transactions and converts it into a QBO-ready output
- Download the QBO file
- Upload the QBO file manually into QuickBooks
While this method does the job of converting PDF statements to QBO, it can get quite cumbersome – especially if you have a large number of bank statements to manually upload into QuickBooks.
Imagine converting hundreds of PDF bank statements into QBO one at a time and then uploading them into QuickBooks!
This is where AI-based intelligent document processing software, like Nanonets, can help.
Let’s find out how.
How to directly import PDF statements into QuickBooks using Nanonets
Here’s how you can directly import your PDF bank statements into QuickBooks without having to convert the PDF bank statements to QBO first:
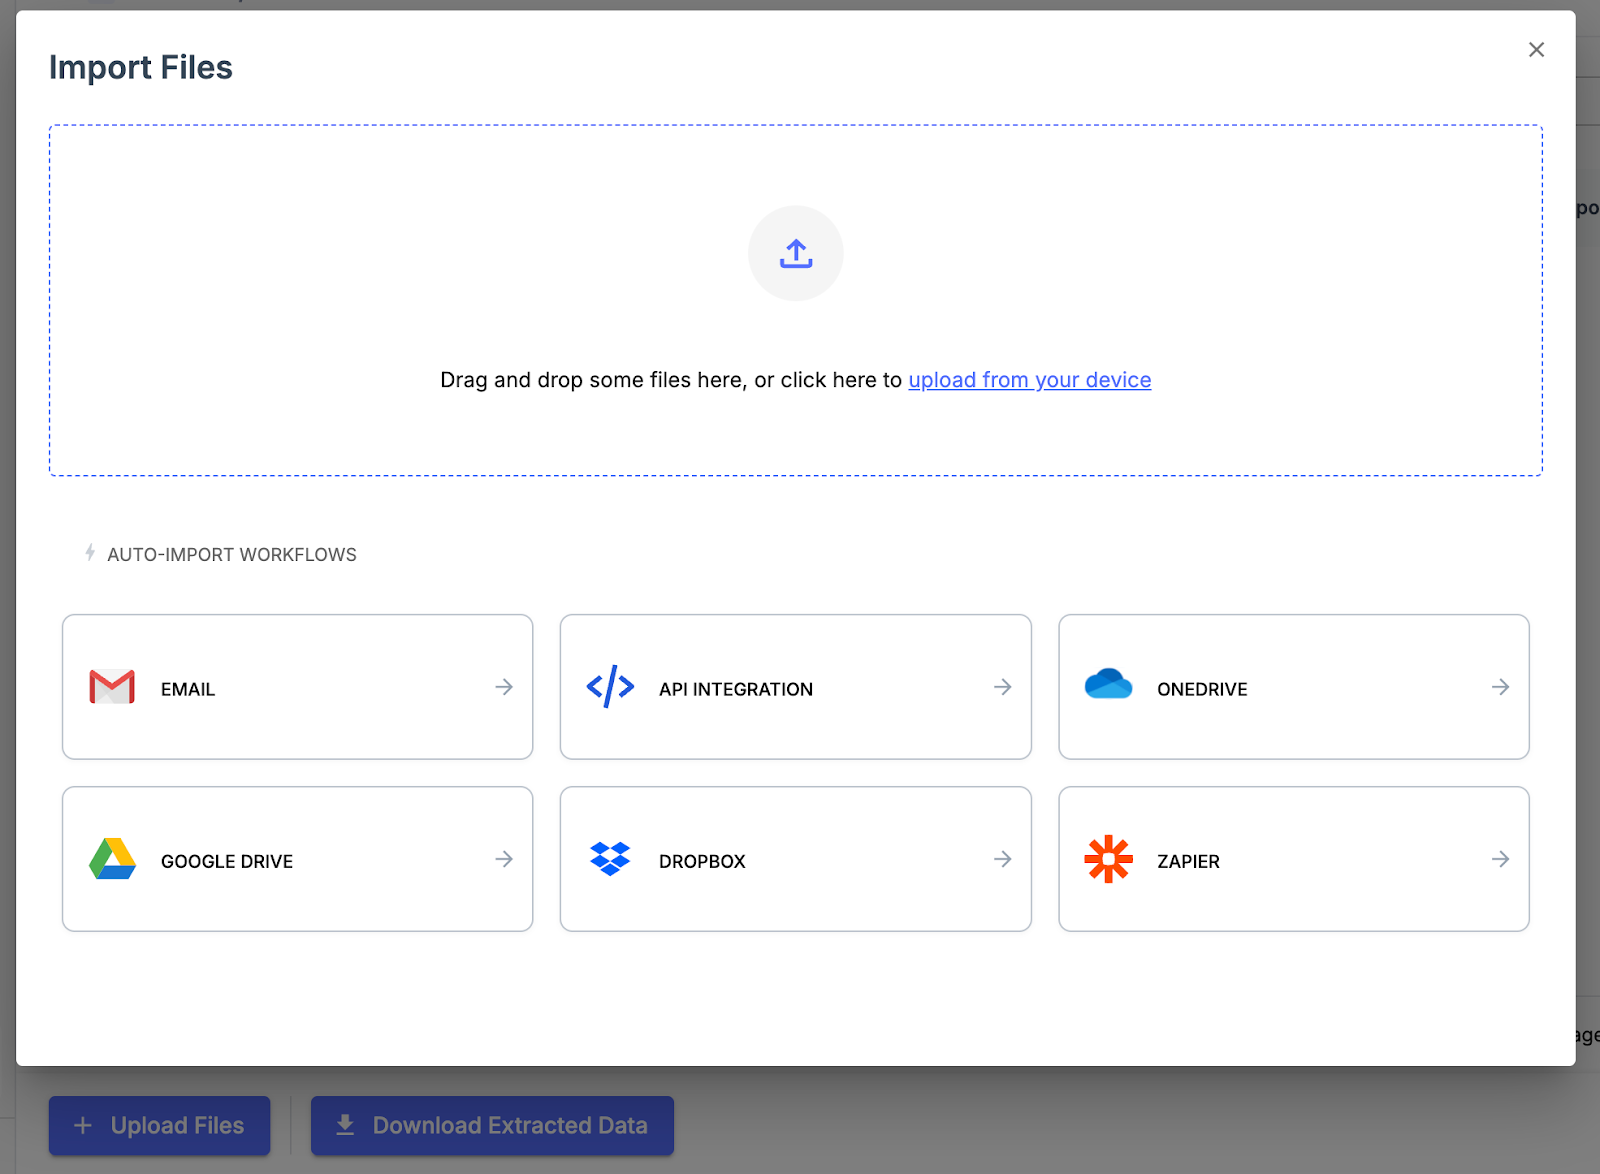
- Sign up on app.nanonets.com
- Click on New Workflow >> Bank Statement
- Click on Upload to bulk upload your PDF bank statements in one go.
- Nanonets’ AI extractor automatically captures the bank transactions neatly
💡
Set up data validations with Nanonets to automatically reconcile or verify the bank statements that you’ve just uploaded. Learn more.
You can set up validation to check whether the totals match the sum of transactions, flag duplicate or missing transactions, reconcile statements against your own accounting records.
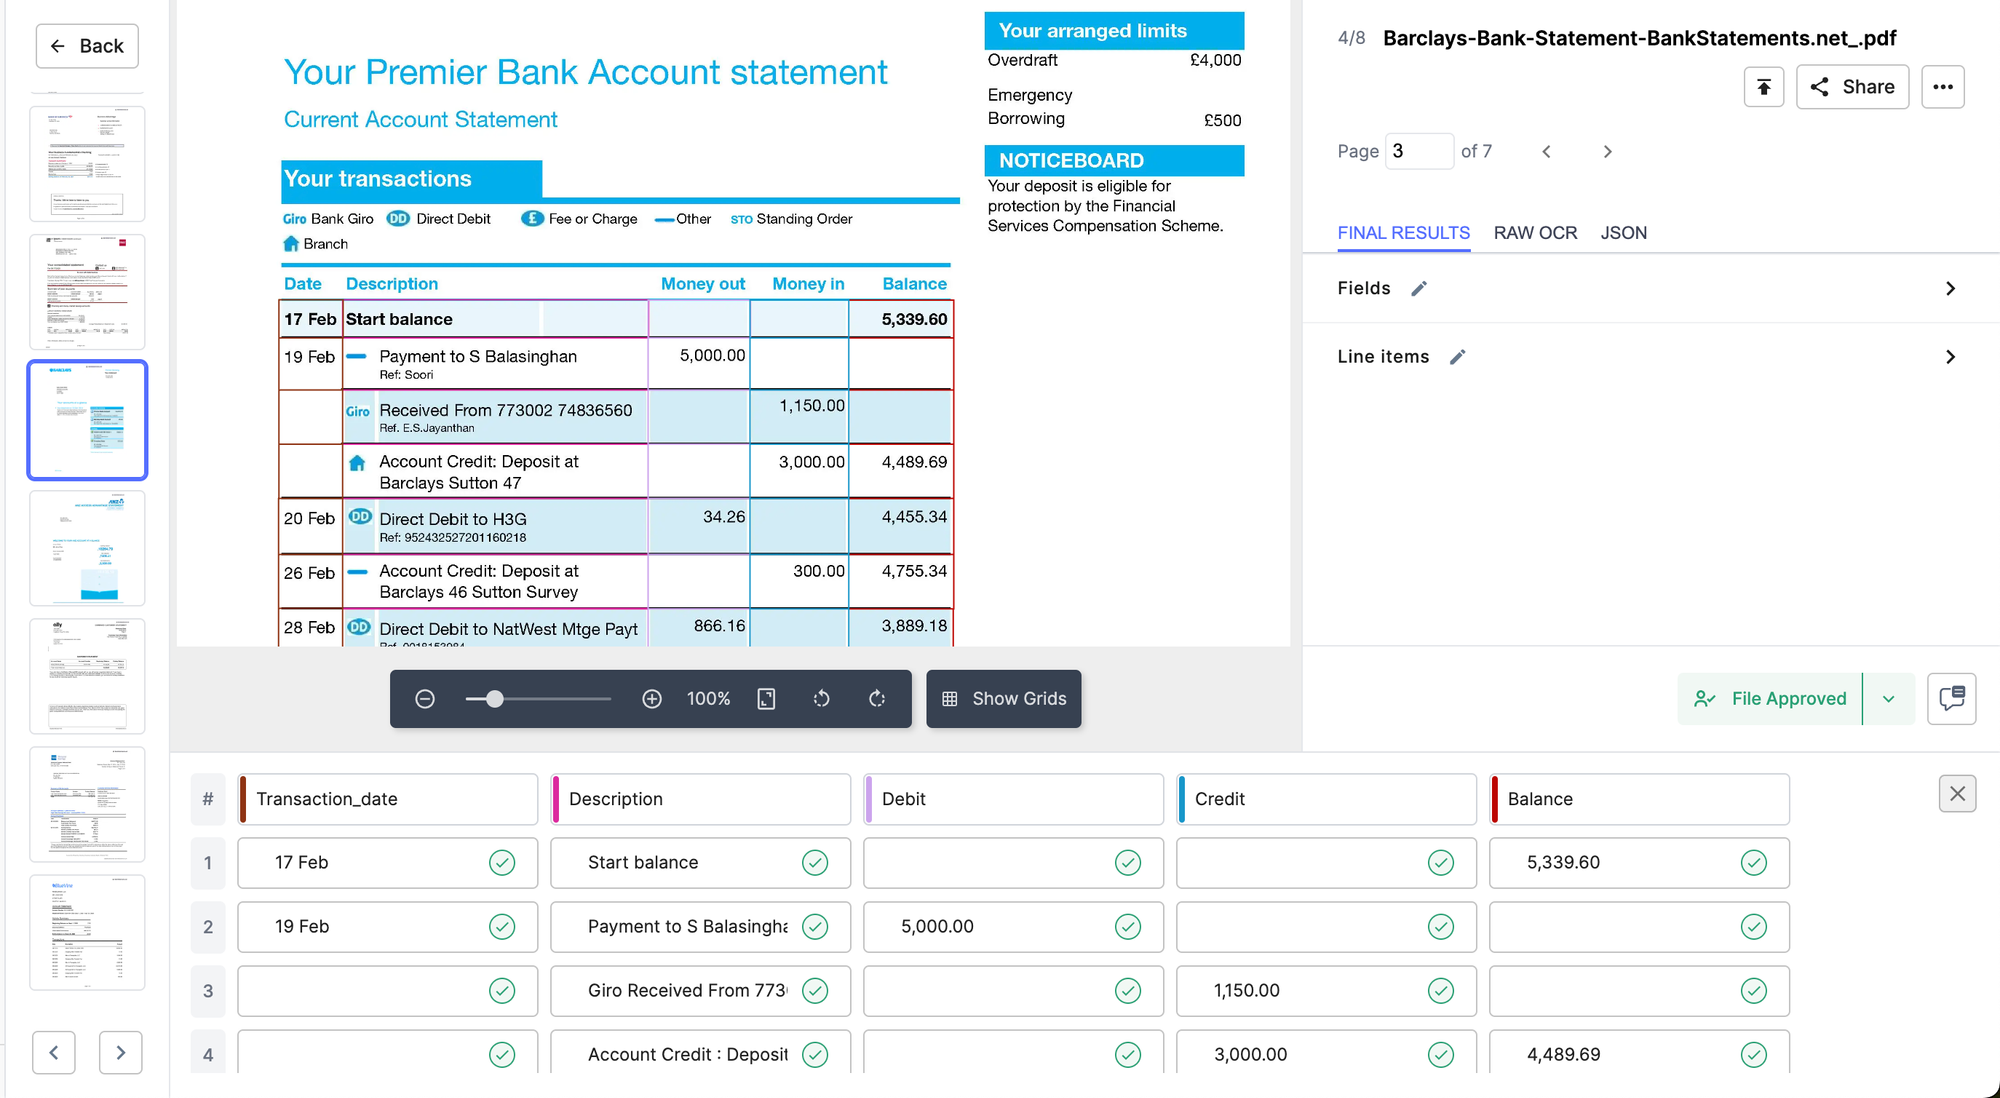
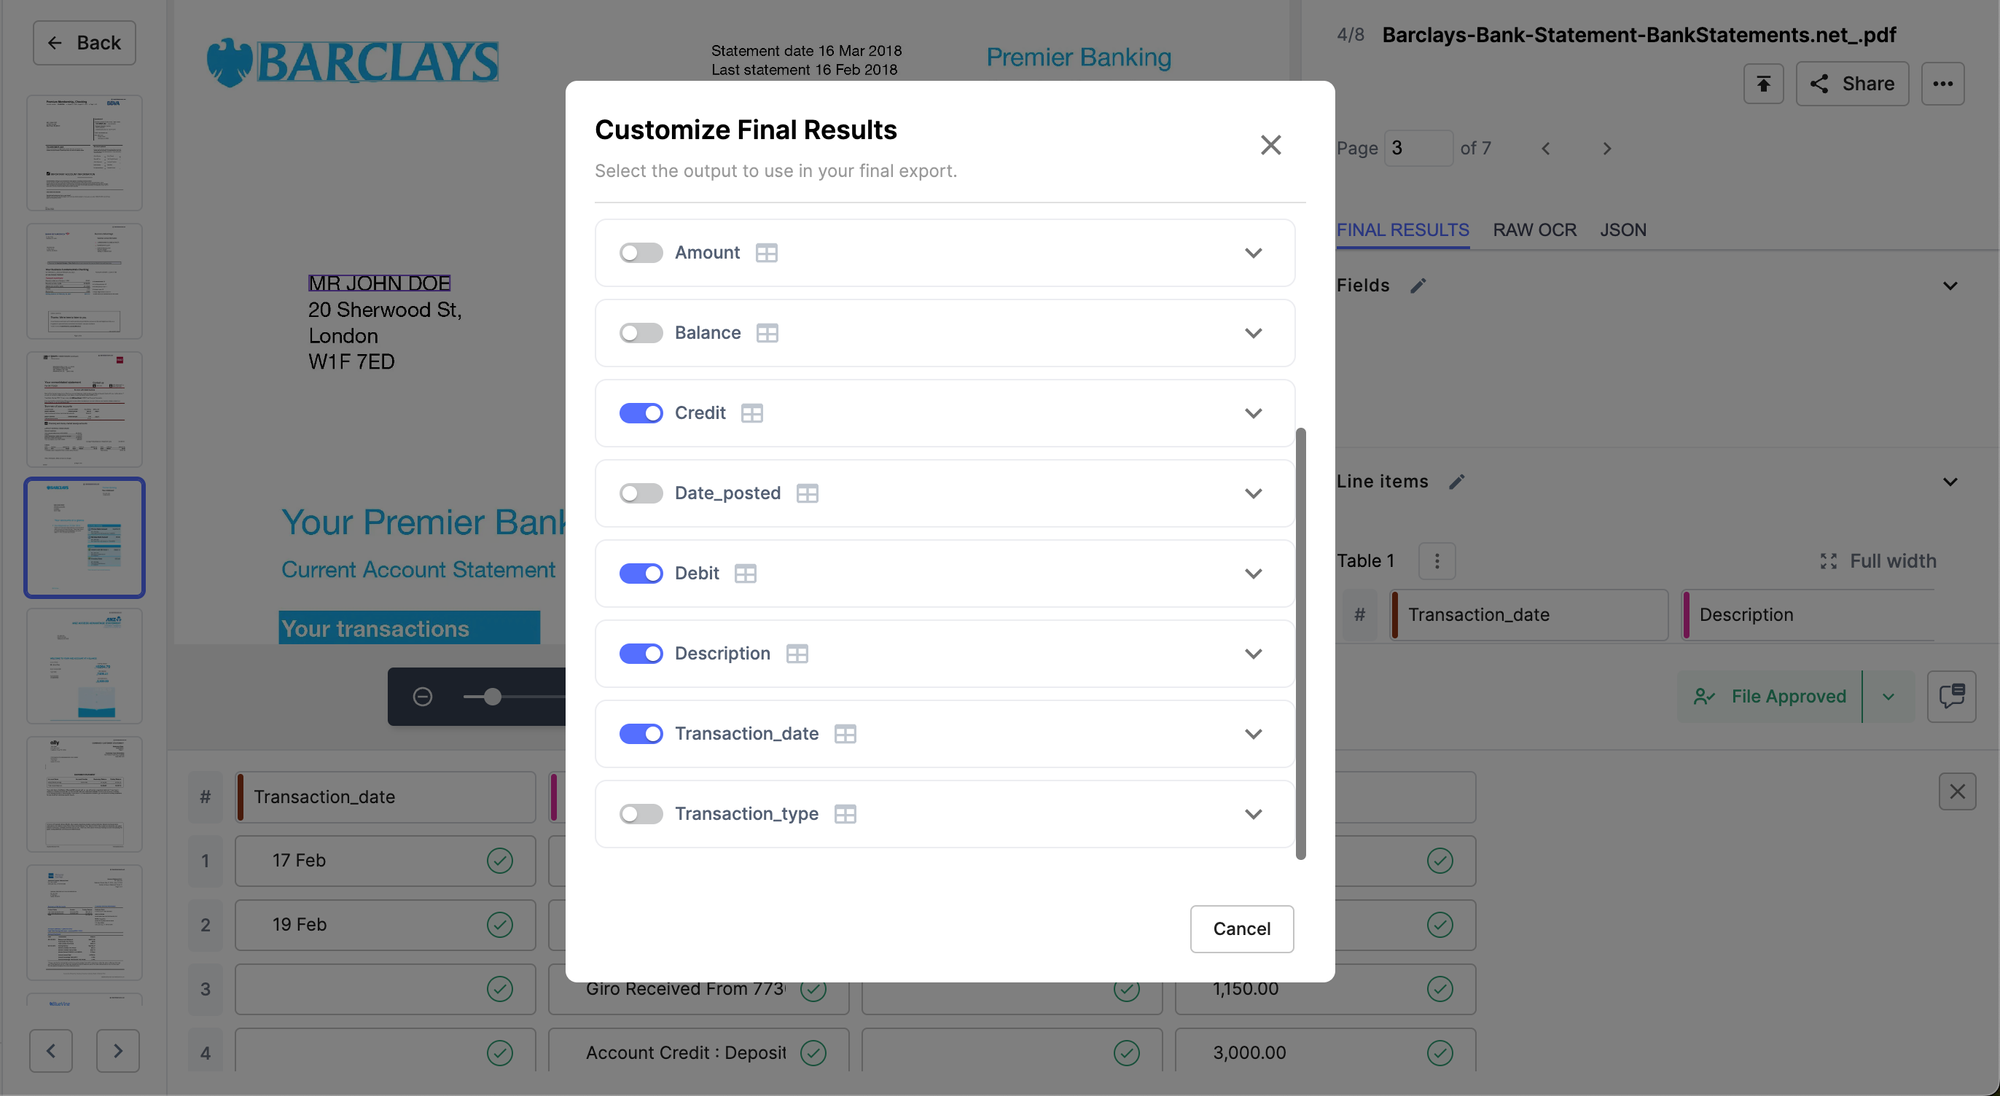
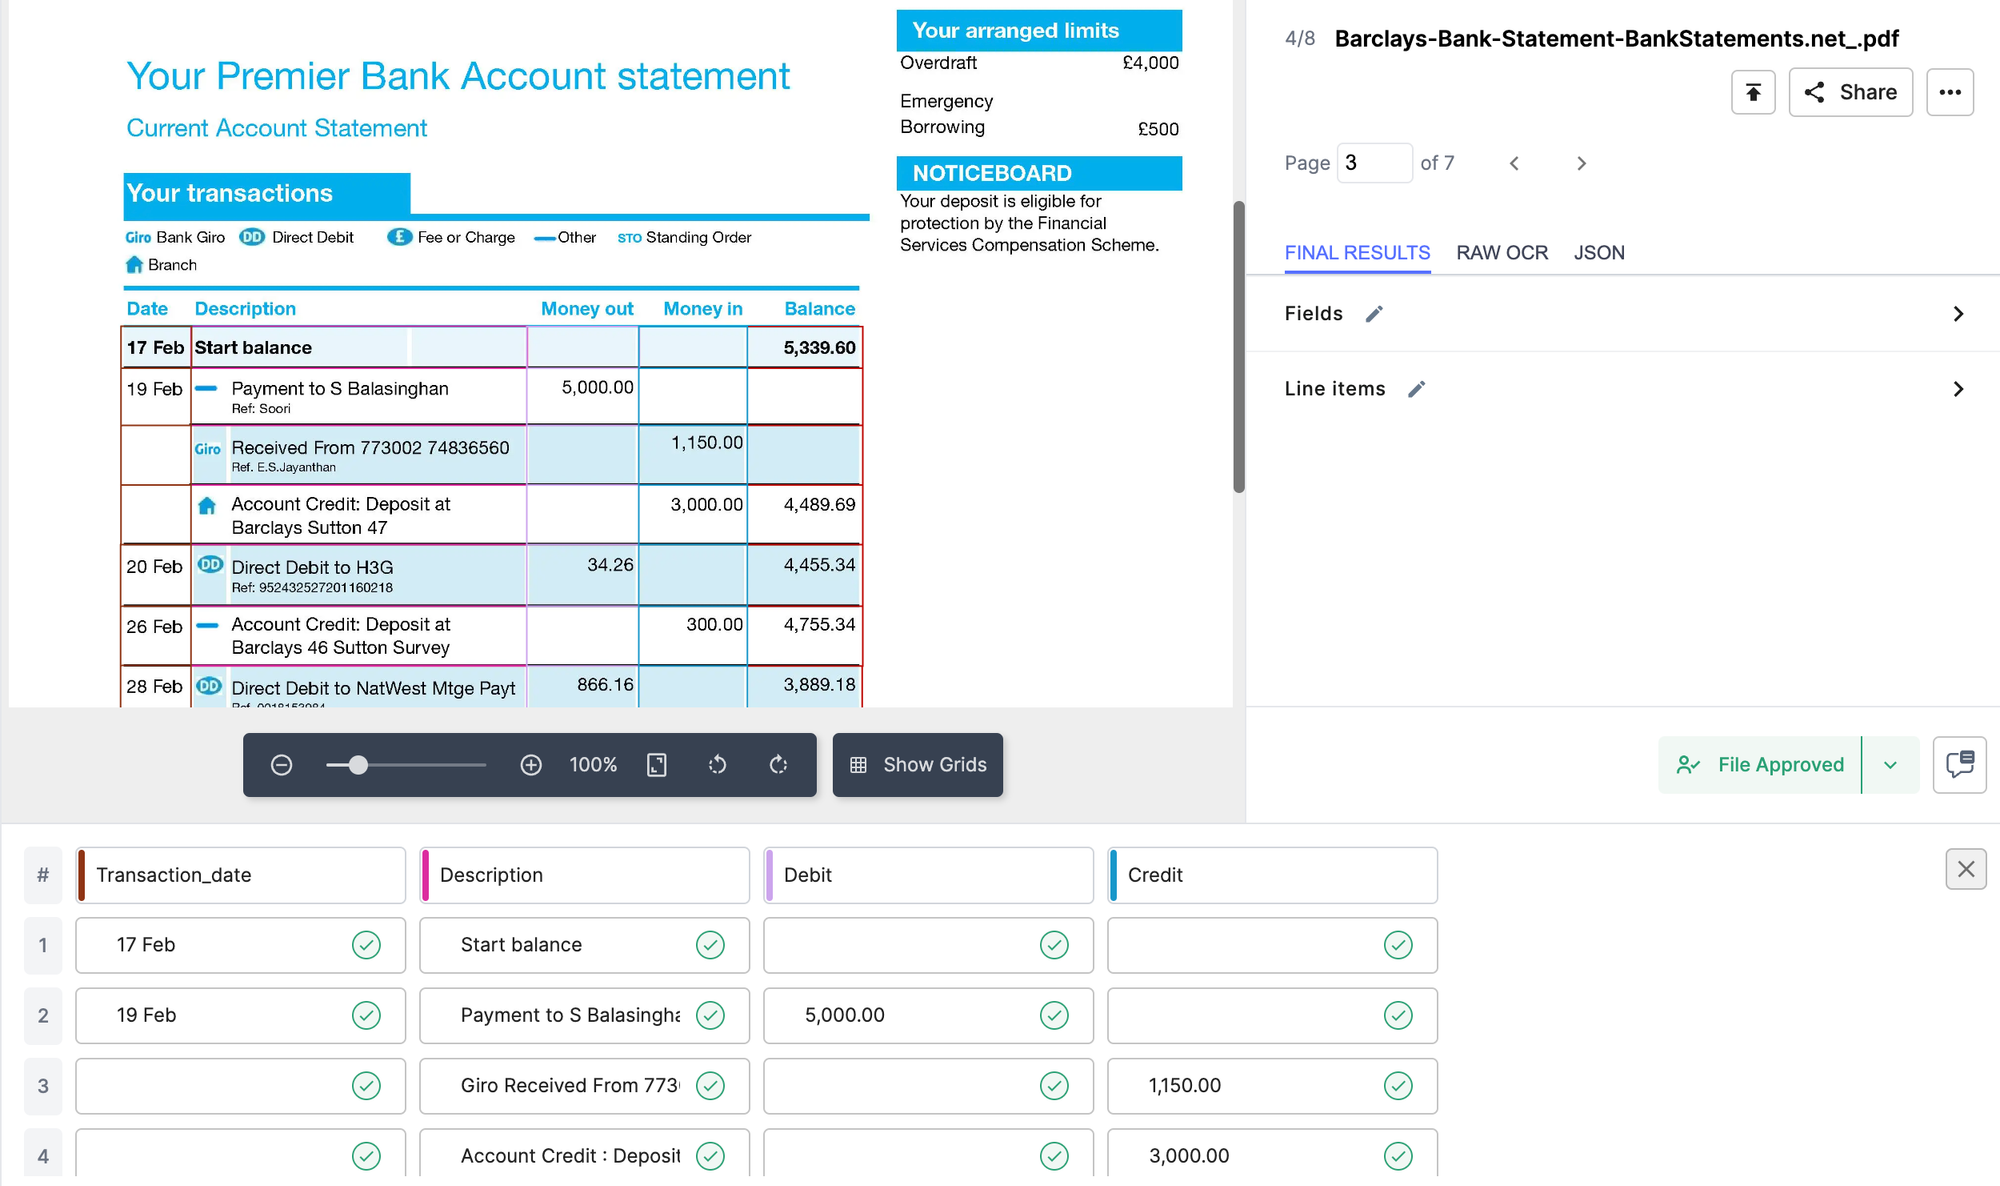
- Customise the final output to only display the transaction date, description, debit and credit columns
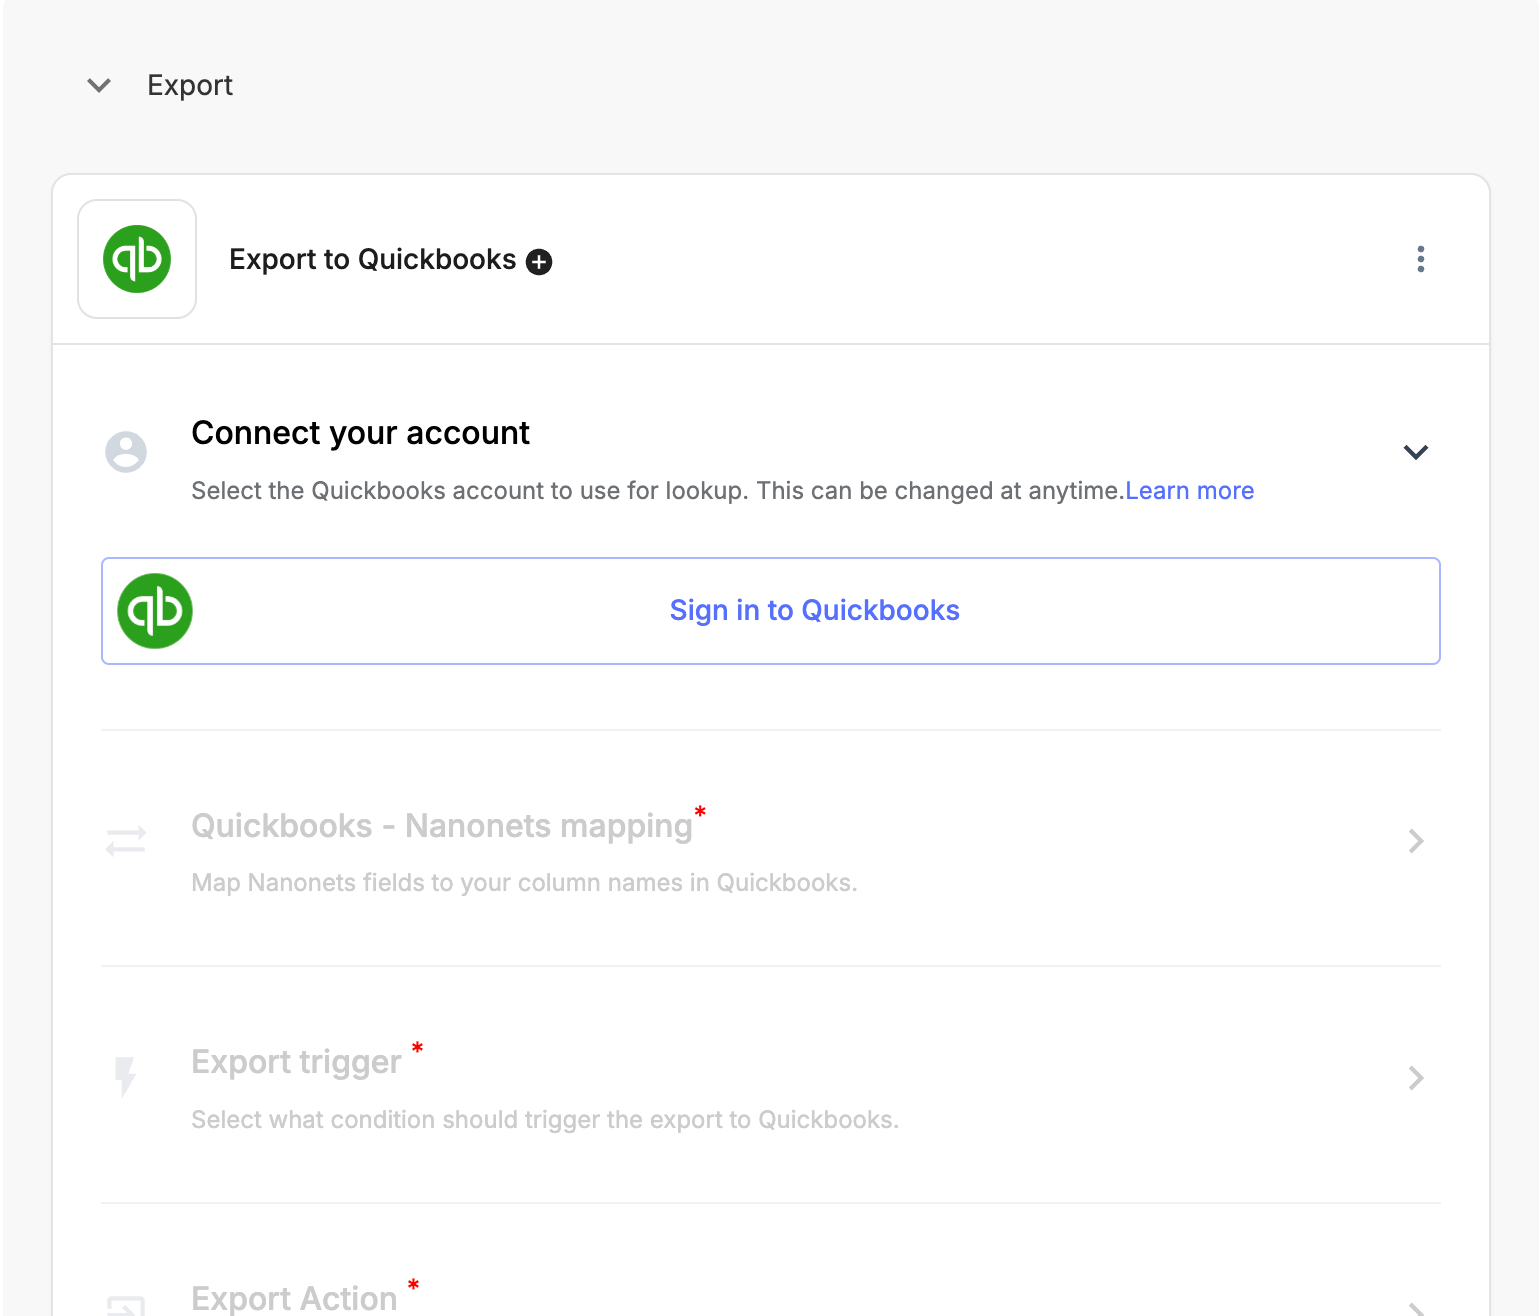
- Click Back >> Workflow Setup >> Export >> select the QuickBooks option >> name your integration >> and click on Configure in Workflow
- Sign in to your Quickbooks account and follow the instructions to setup the Quickbooks integration
There you go!
You now have an automated workflow that pulls in PDF statements into your QuickBooks account.
